All Sony Ericsson HOW TO FLASH STOCK ROMs WITH FLASHTOOL Guide 100% Working
I would like to thank Androxyde for the FlashTool
***BEFORE YOU FOLLOW THIS TUTORIAL MAKE SURE THAT YOU HAVE INSTALLED SONY PC COMPANION ON YOUR PC***
HOW TO FLASH STOCK FIRMWARE (.FTF/ROM) ON YOUR XPERIA
1: First of all you need to make sure you download the LATEST Flashtool from Here
If it is your first time for your phone on the PC, install the flashmode driver, and then get the HW detection to work. Eg, install the driver, then turn off your phone, and then hold down the Down volume button and plug it in – windows will then go into hw detection and install the driver for the phone. It will try to check online, so skip that, and it will install the proper driver you just locally installed.
Thanks to Mobe1969 from the Whirlpool forum
NOTE: Been seeing people having problems flashing stock .253 based ROMs. Thanks to gm007 for suggesting to use the beta4 version of FlashTool if flashing stock .253 ROMs. You can download beta4 version from here
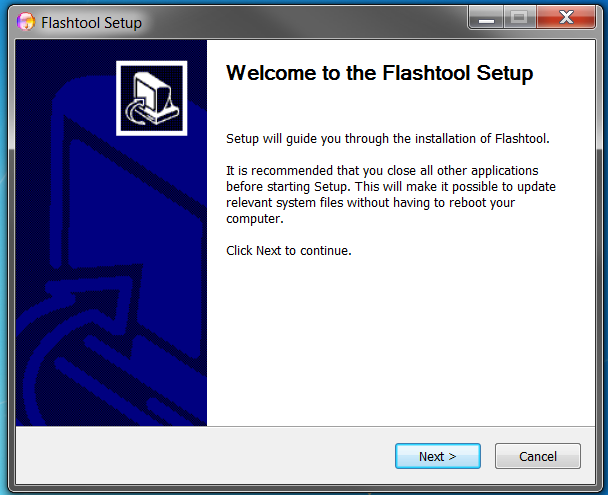
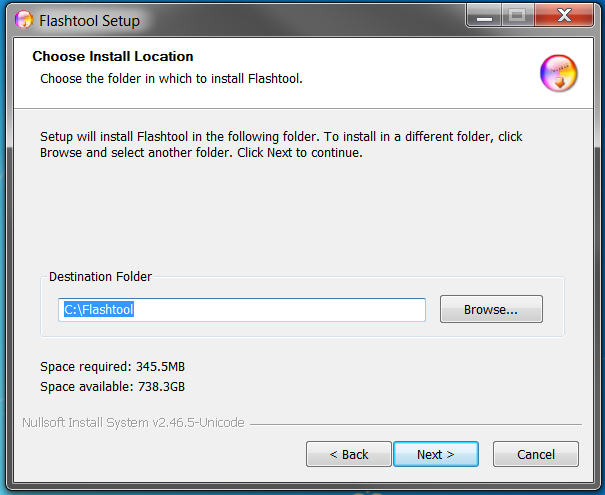
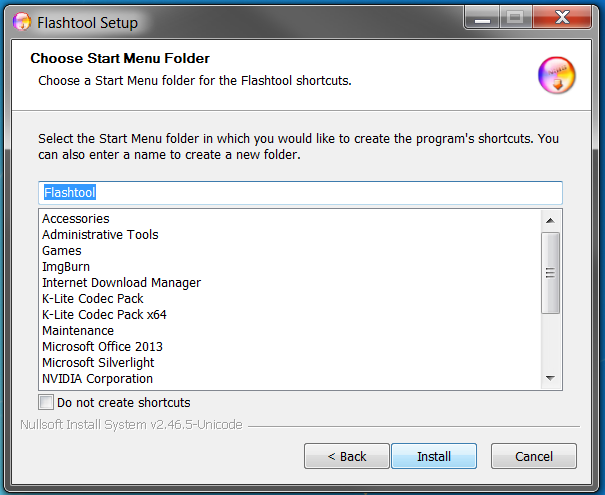
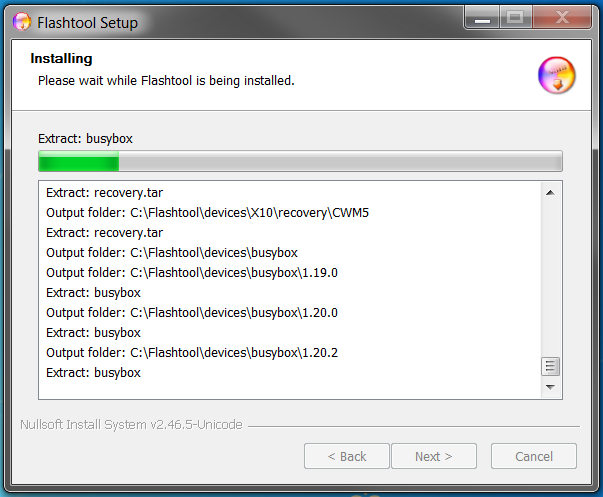
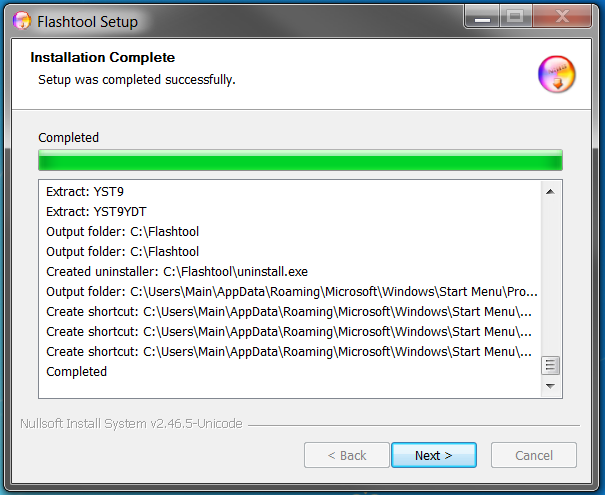
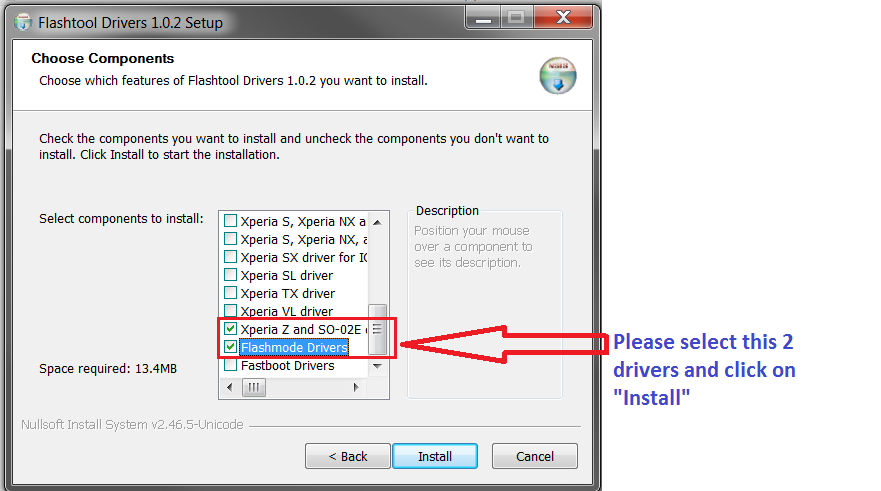
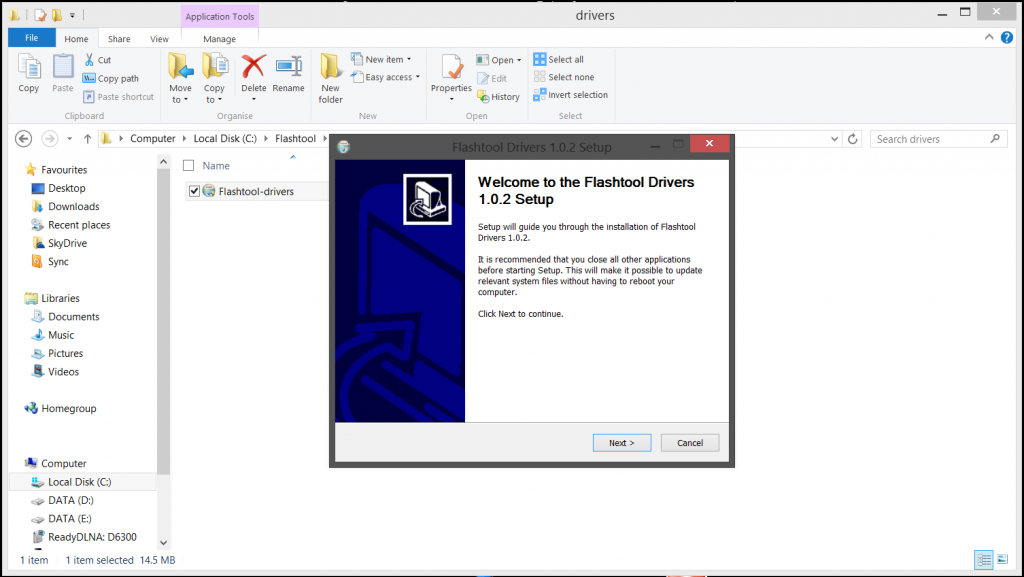
Install Flashtool and install the drivers for the XZ Please see picture below:
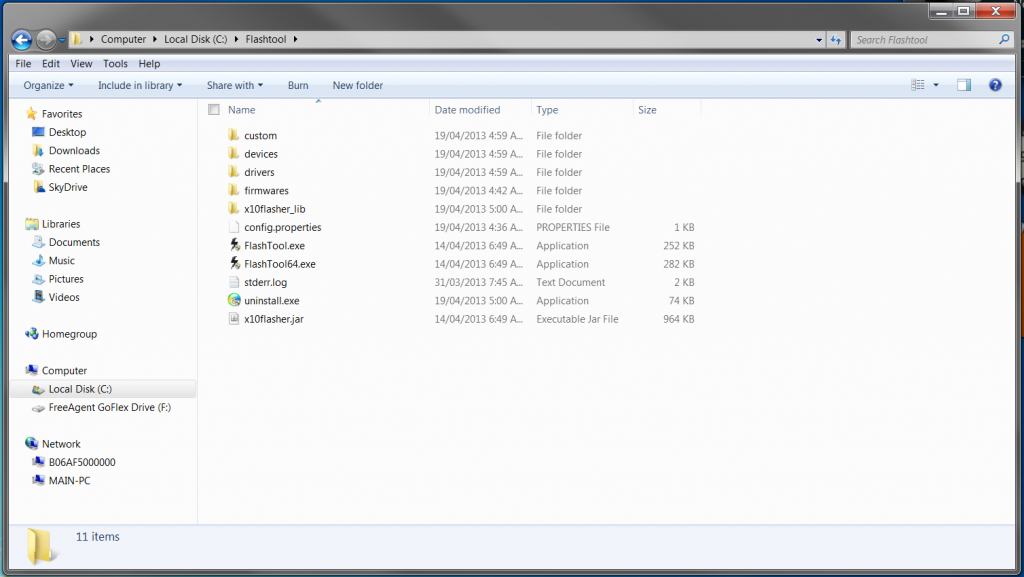
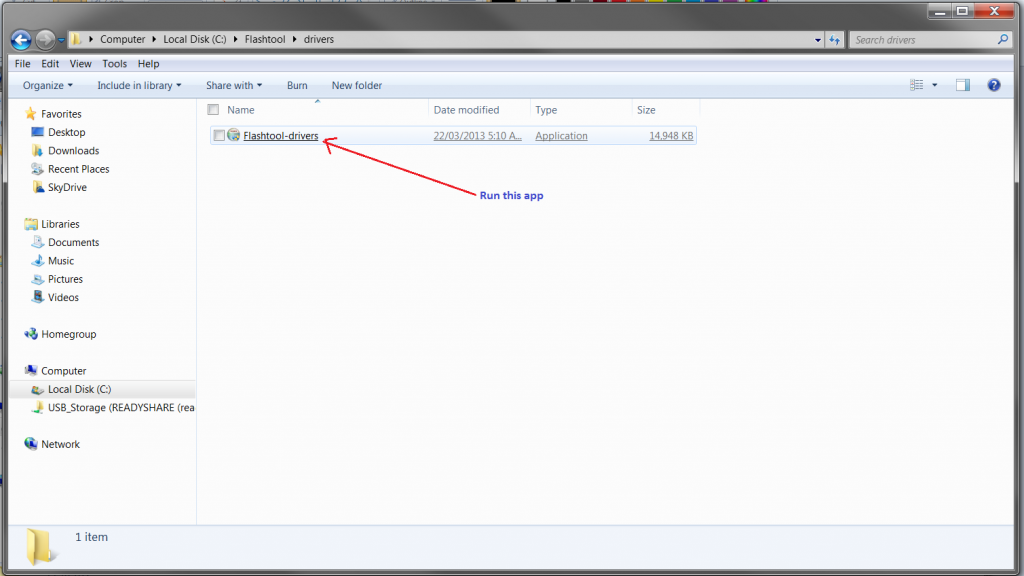
2: Once installation is complete, navigate to the folder where FlashTool is installed as shown in the picture below
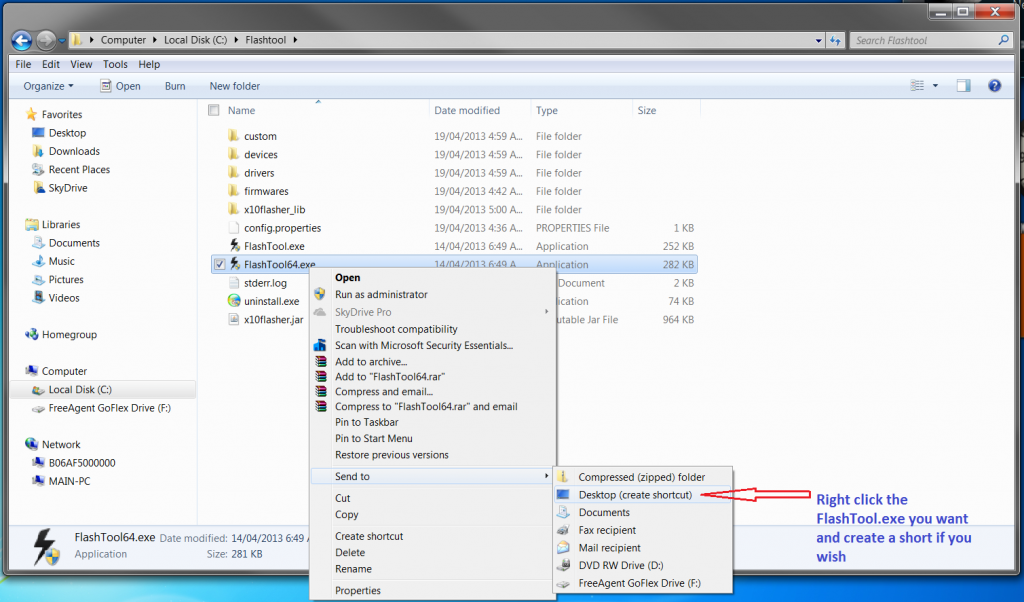
2a: This is optional if you want to create a shortcut to the desktop
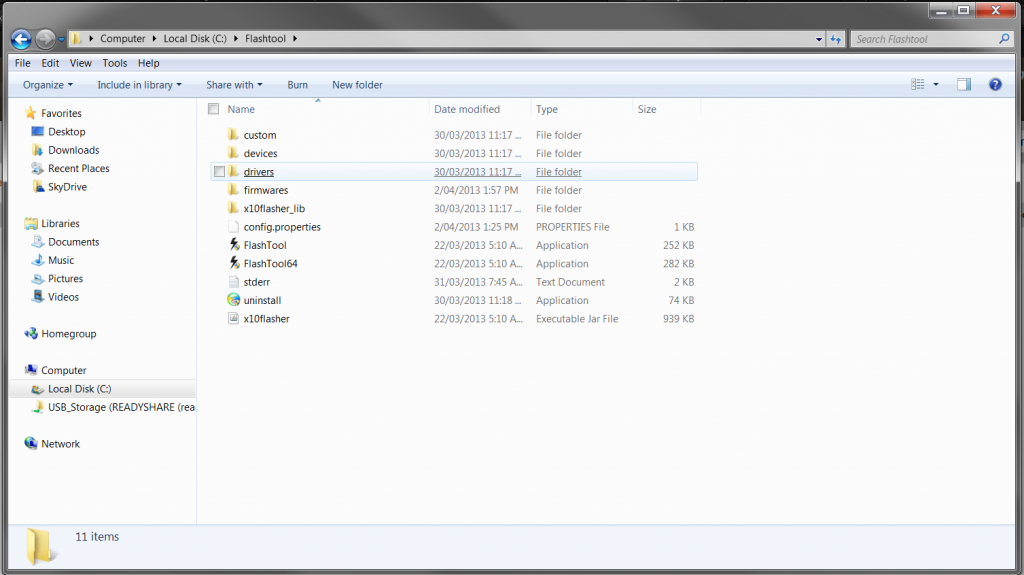
3: Now install the driver for the Xperia Z. The driver installer can be found in the FlashTool folder See pictures below:
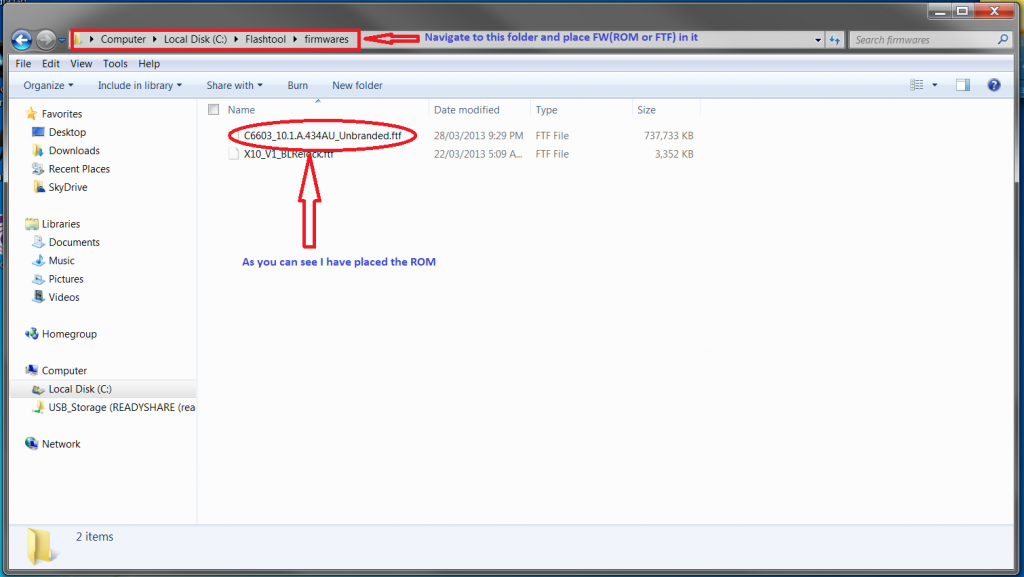
4: Now for Flashing your Xperia Z. You will need to download the STOCK .ftf (firmware/ROM) and place it in the firmware folder located in the flashtool folder
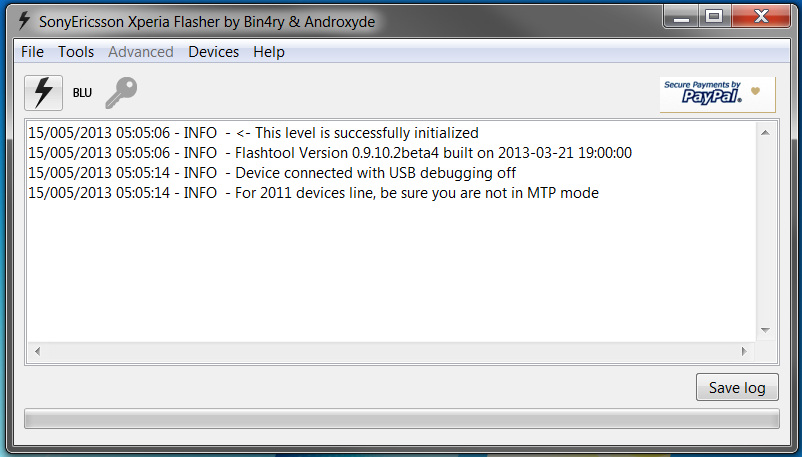
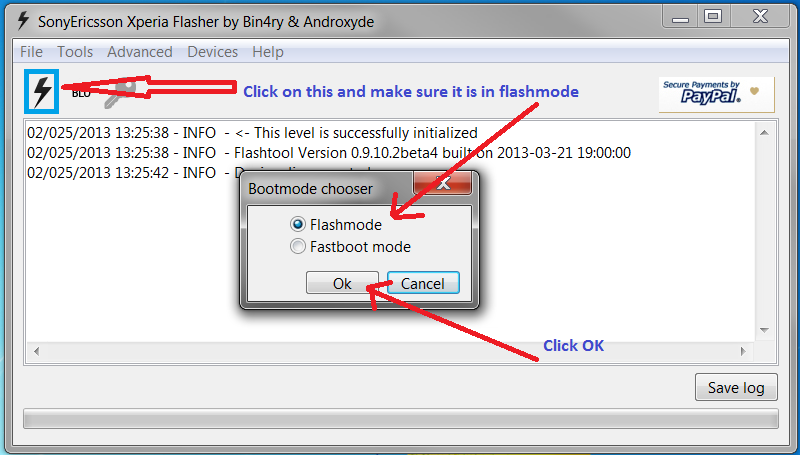
5: Now for flashing. Run the FlashTool app. Make sure that it's in "Flashmode" and click "Ok"
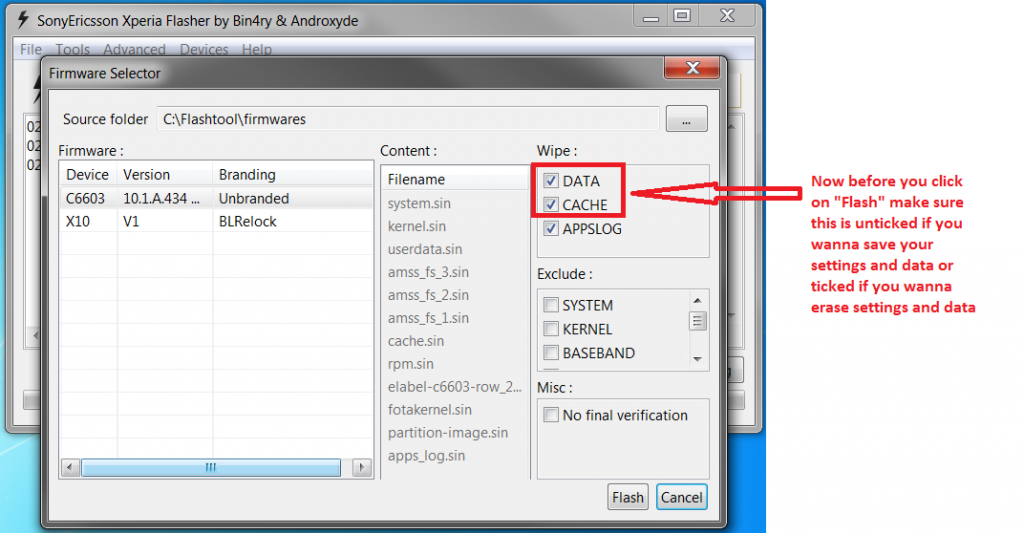
6: This window should show up. Please select the ROM you are gonna flash. And follow the prompts
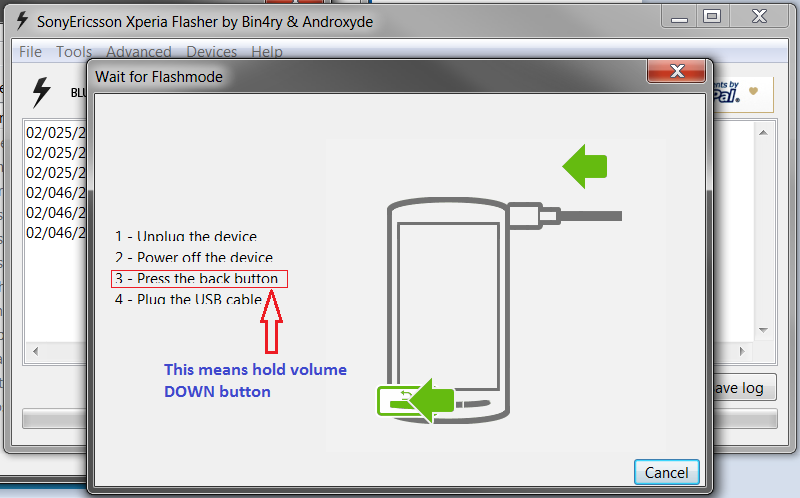
**NOTE** Please FOLLOW the prompts! The picture below says:
1:Unplug your device from your PC
2:Power OFF the device (Turn your phone OFF)
3:Hold down the VOLUME DOWN button
4:While holding the VOLUME DOWN button plug your phone back to your PC
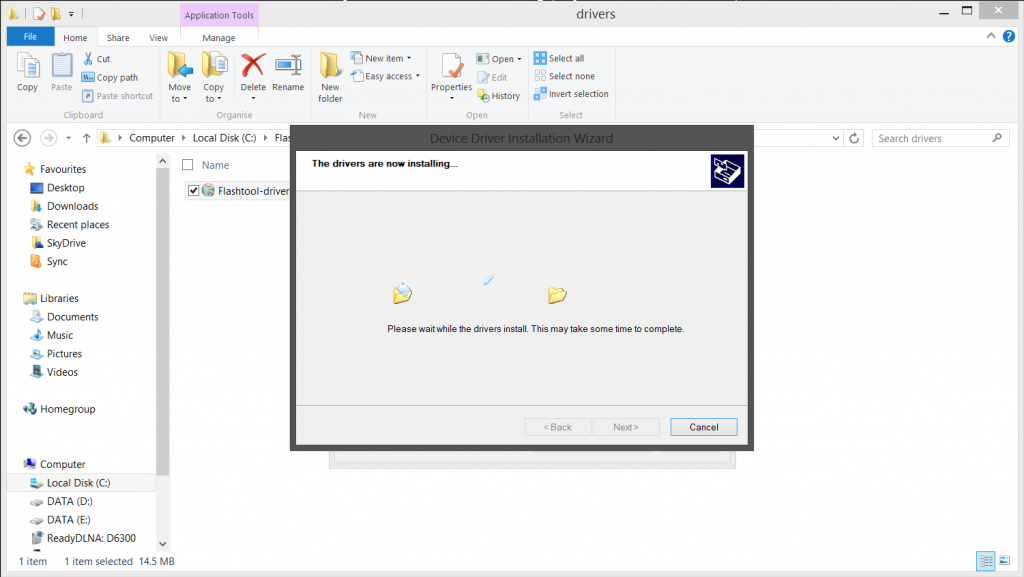
The process should look like this. Please wait until it is finished See pictures below:
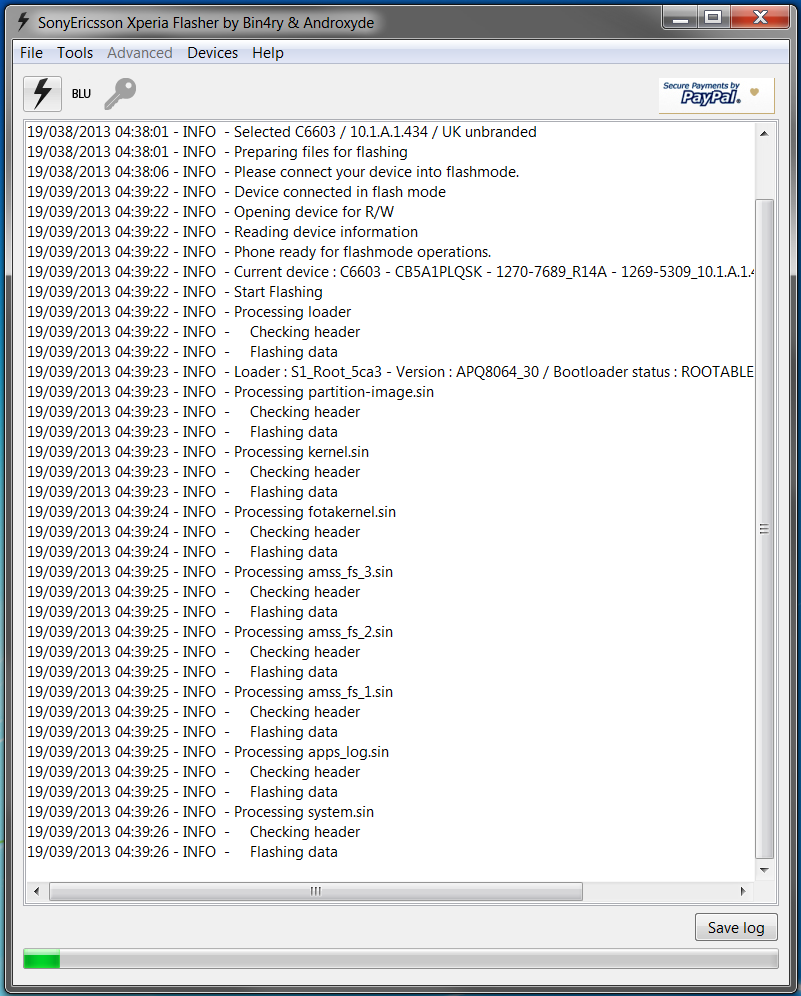

And that is it, you are all done. Power up your Xperia Z and enjoy your new stock ROM
PART 2: Driver installation in Windows 8
Okay since people are having trouble installing drivers for the Xperia Z in Windows 8. I made a tutorial on how to install the Xperia Z driver using the FlashTool in Windows 8.
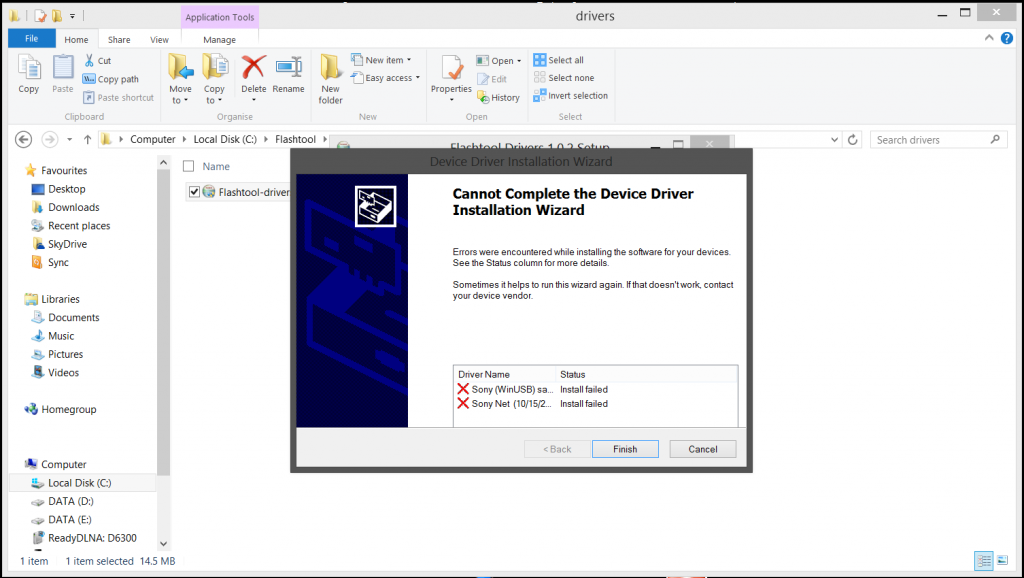
As shown in the picture below when you try to install the drivers for the Xperia Z in Windows 8 for the first time this is what happens:
As you can see the drivers didn't install:
So here are the steps to install the drivers:
Step 1: Go to "Settings" (if you don't know how to do this, place your mouse pointer in the upper right corner or bottom right corner of your screen and the sidebar should pop out as shown in the picture below):

Step 2: Click on "Change PC settings" as shown in the picture below:

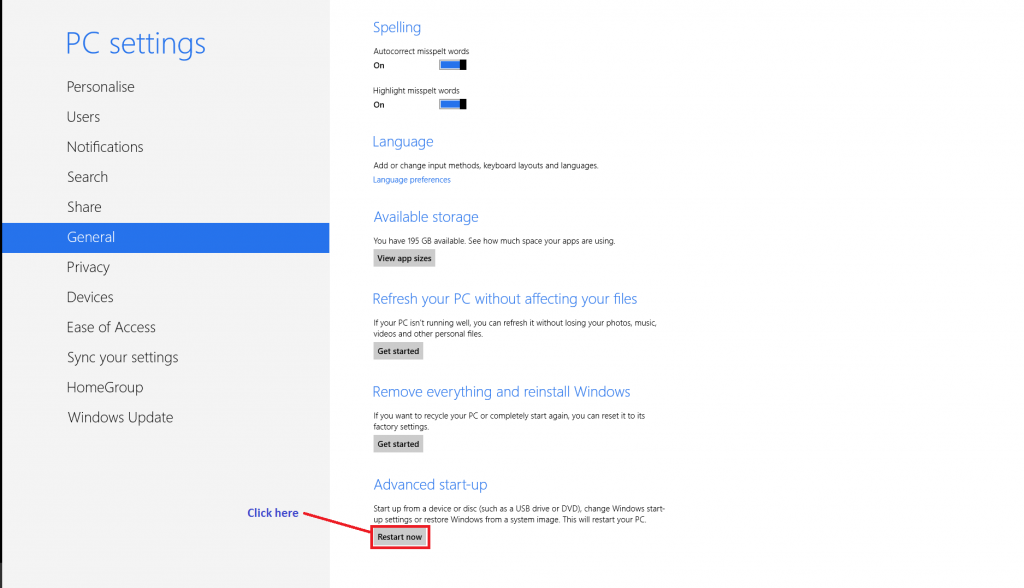
Step 3: When you get to this screen, scroll down to "Advanced start-up" and click the "Restart now" tab. See picture below:
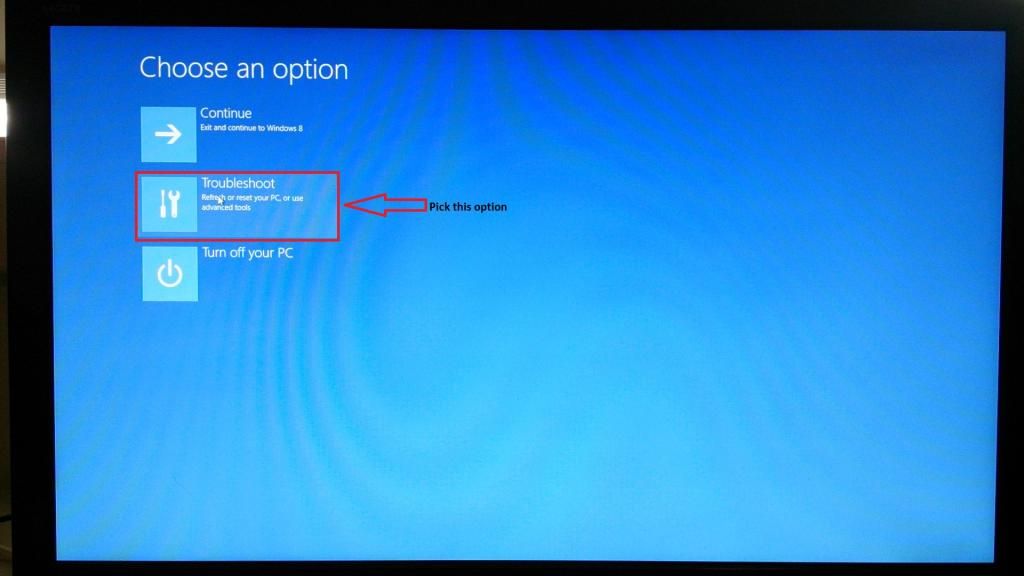
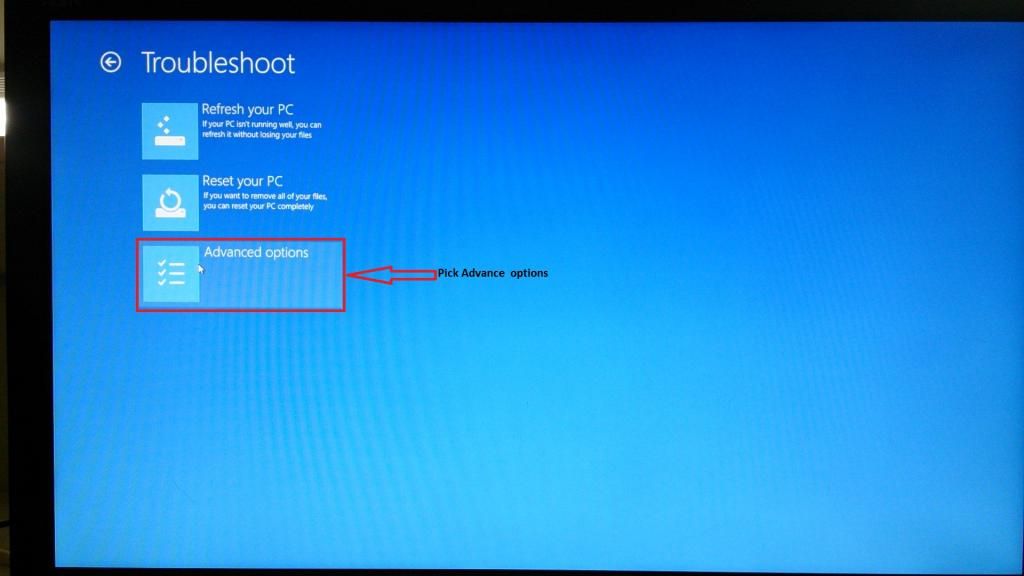
Step 4: When your PC restarts and goes to this screen click on "Troubleshoot" as shown in the picture below:
Step 5: Now click on "Advanced options" as shown in the picture below:
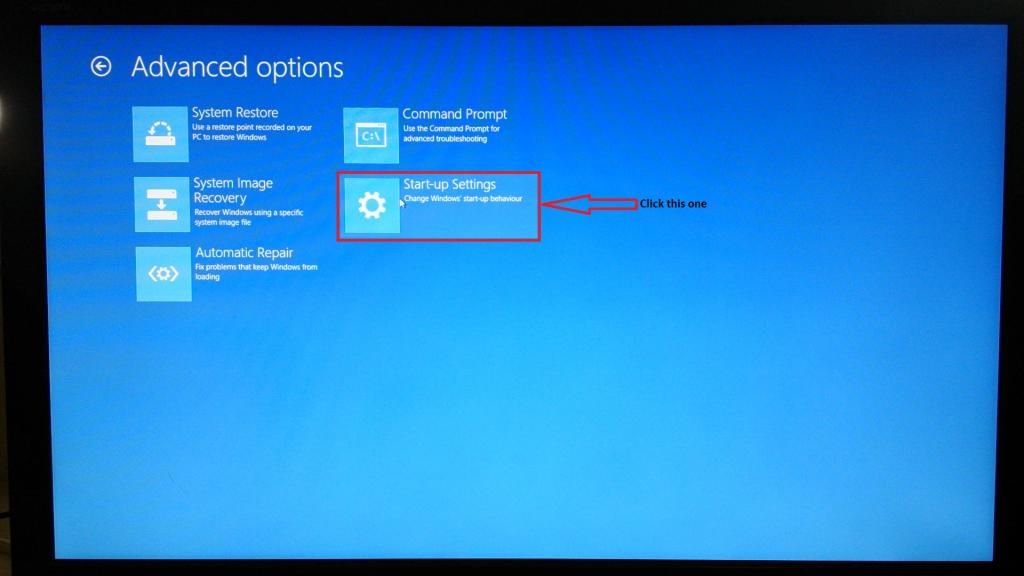
Step 6: Now click on "Start-up Settings" as shown in the picture below:
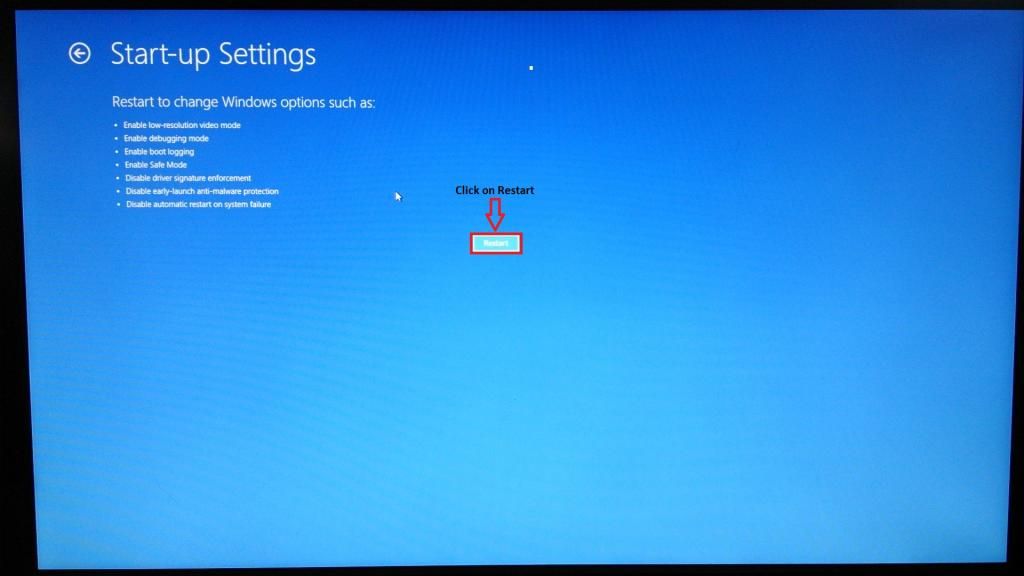
Step 7: When you get to this screen, click on the "Restart" tab as shown in the picture below:
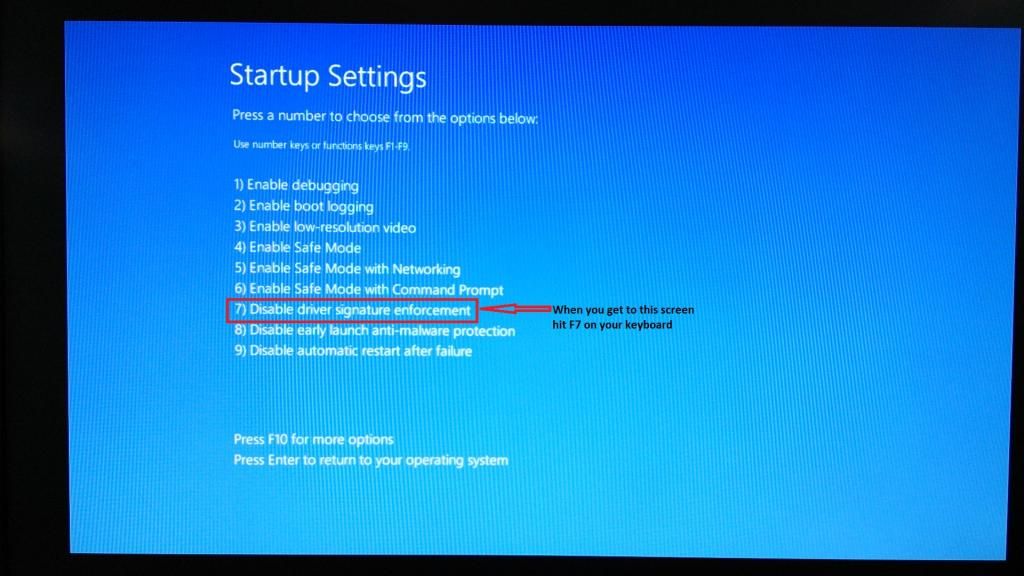
Step 8: Okay when you get to this screen just hit the "F7" on your keyboard:
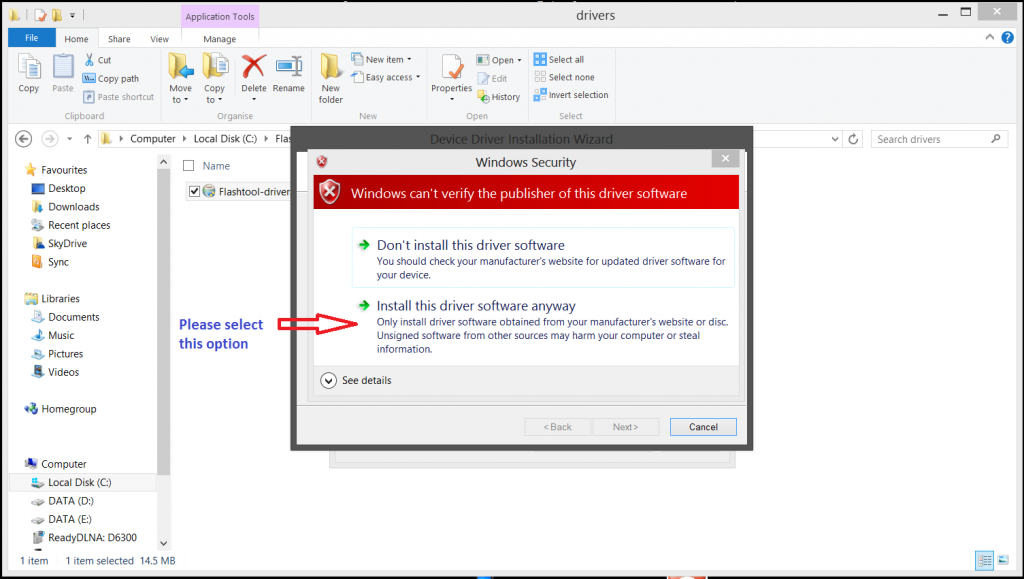
Step 9: Now go and reinstall the driver for the Xperia Z. When you get this pop-up window, please select "Install this driver software anyway" as shown in the picture below:
The process will look like this:
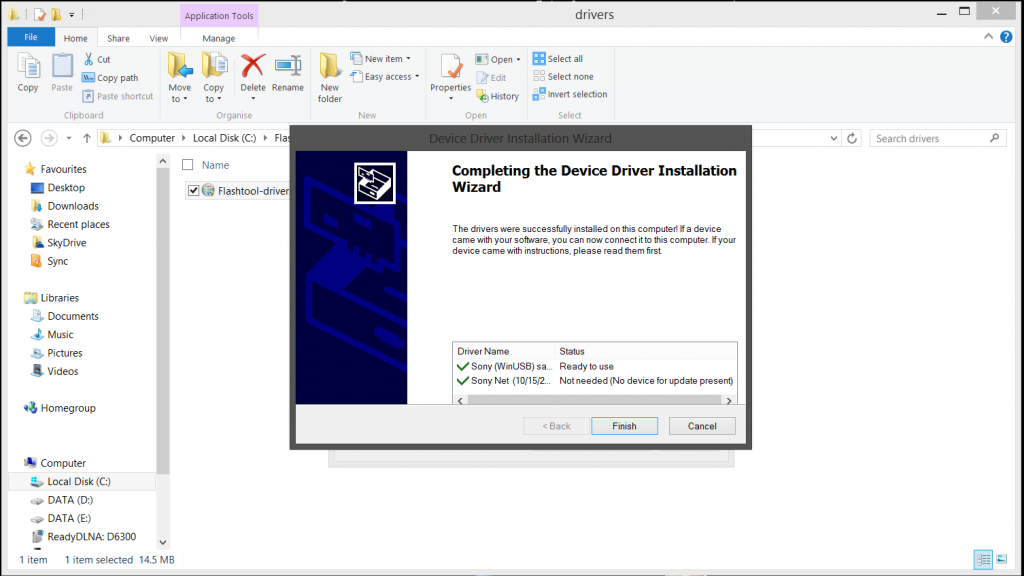
As you can see in the last picture that the drivers are now installed.
I hope that helps out people who are new to flashing the Xperia Z
Install Flashtool and install the drivers for the XZ Please see picture below:
2: Once installation is complete, navigate to the folder where FlashTool is installed as shown in the picture below
2a: This is optional if you want to create a shortcut to the desktop
3: Now install the driver for the Xperia Z. The driver installer can be found in the FlashTool folder See pictures below:
4: Now for Flashing your Xperia Z. You will need to download the STOCK .ftf (firmware/ROM) and place it in the firmware folder located in the flashtool folder
5: Now for flashing. Run the FlashTool app. Make sure that it's in "Flashmode" and click "Ok"
6: This window should show up. Please select the ROM you are gonna flash. And follow the prompts
**NOTE** Please FOLLOW the prompts! The picture below says:
1:Unplug your device from your PC
2:Power OFF the device (Turn your phone OFF)
3:Hold down the VOLUME DOWN button
4:While holding the VOLUME DOWN button plug your phone back to your PC
The process should look like this. Please wait until it is finished See pictures below:
And that is it, you are all done. Power up your Xperia Z and enjoy your new stock ROM
PART 2: Driver installation in Windows 8
Okay since people are having trouble installing drivers for the Xperia Z in Windows 8. I made a tutorial on how to install the Xperia Z driver using the FlashTool in Windows 8.
As shown in the picture below when you try to install the drivers for the Xperia Z in Windows 8 for the first time this is what happens:
As you can see the drivers didn't install:
So here are the steps to install the drivers:
Step 1: Go to "Settings" (if you don't know how to do this, place your mouse pointer in the upper right corner or bottom right corner of your screen and the sidebar should pop out as shown in the picture below):
Step 2: Click on "Change PC settings" as shown in the picture below:
Step 3: When you get to this screen, scroll down to "Advanced start-up" and click the "Restart now" tab. See picture below:
Step 4: When your PC restarts and goes to this screen click on "Troubleshoot" as shown in the picture below:
Step 5: Now click on "Advanced options" as shown in the picture below:
Step 6: Now click on "Start-up Settings" as shown in the picture below:
Step 7: When you get to this screen, click on the "Restart" tab as shown in the picture below:
Step 8: Okay when you get to this screen just hit the "F7" on your keyboard:
Step 9: Now go and reinstall the driver for the Xperia Z. When you get this pop-up window, please select "Install this driver software anyway" as shown in the picture below:
The process will look like this:
As you can see in the last picture that the drivers are now installed.
I hope that helps out people who are new to flashing the Xperia Z
Categories:
Sony Ftf Lock File


